Over time, air can accumulate inside your heating system, causing pockets of trapped air within the radiators.
This trapped air prevents hot water from circulating effectively, leading to cold spots and reduced heating efficiency.
You can release the trapped air by bleeding your radiators, allowing hot water to flow freely and evenly throughout the system, maximising its performance.
When should you bleed a radiator?
If you feel any cold spots around the top of the radiator surface, or you could find that your radiator doesn’t get hot.
Another signal that you may have air building up and need to bleed your radiator is when you can hear clanging or prolonged groaning when you switch on your central heating.
Tools Needed:
- Radiator key: A radiator key is a specialised tool designed to fit into the bleed valve, allowing you to open it easily. You could also use a flathead screwdriver if you don’t have a radiator key.
- Cloth or towel: Keep a cloth or towel handy to catch any water that may escape during bleeding.
- A container: A washing-up bowl or similar to place under the radiator to catch any water.
Step 1: Turn off the central heating system
Before starting the bleeding process, turn off your heating system.
It is essential to allow your heating to cool entirely before bleeding any radiators to ensure your safety and prevent burns from hot water.
Step 2: Locate the valve
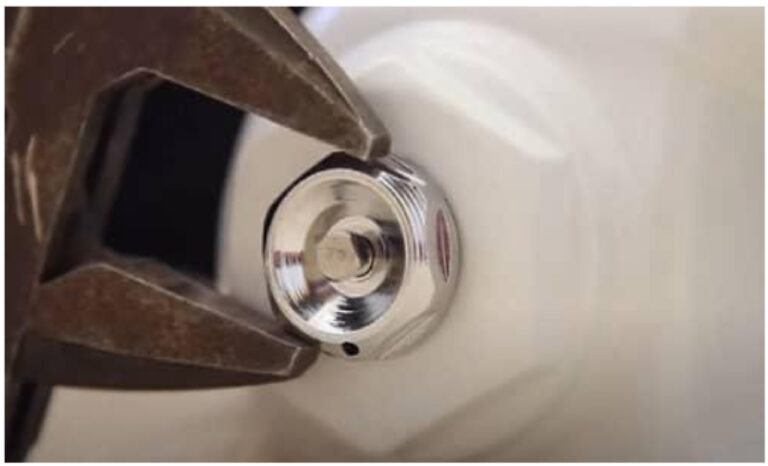
To locate the valve, check the top edge of the radiator – the release valve looks like a small, square or hexagonal nut. A double radiator will have a valve on each panel, and you must bleed both. Universal radiators can also have a valve on the back panel, so check for this.
Step 3: Protect the surrounding area
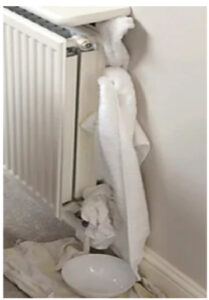
Place your cloths or towels behind the radiator, underneath it, and your bowl below the bleed valve to catch any water that may drip out. This prevents any water from staining your flooring or carpets.
Step 4: Insert the radiator key
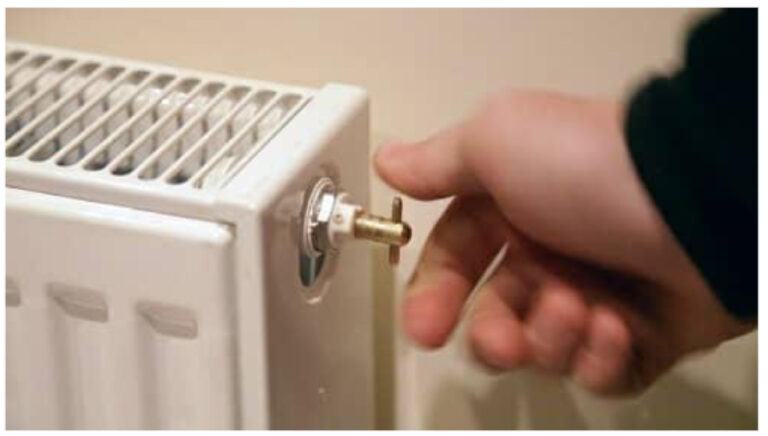
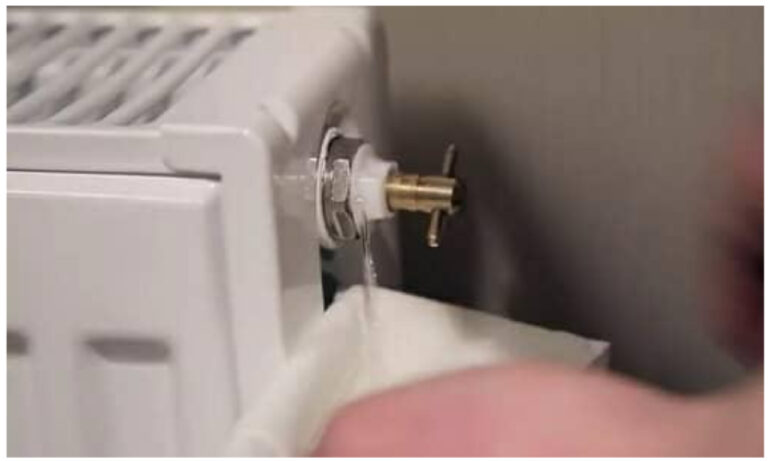
Insert the radiator key into the bleed valve and turn it counterclockwise. You should hear a hissing sound as the trapped air begins to escape.
Step 5: Release Trapped Air
As the hissing sound stops and water starts to trickle out of the bleed valve, it indicates that the trapped air has been released.
Once a steady stream of water appears, close the bleed valve by turning the radiator key clockwise.
Step 6: Check for Leaks
After bleeding the radiator, inspect the bleed valve for any signs of leakage.
If you notice any leaks, gently tighten the bleeding valve until the leak stops, but be careful not to tighten it too much, as this may damage the “O” ring and could lead to further problems.
Step 7: Repeat the Process
Repeat the bleeding process for all radiators in your home, starting from the ground floor and working your way up.
This ensures that all radiators are free from trapped air and operating efficiently.
Step 8: Check the pressure gauge on your boiler
Check the pressure gauge on your boiler – If you need to adjust the pressure in your system, you can do this by adjusting the filling loop. You should be able to find instructions for how to do this in the manufacturer’s instructions for your heating system. If you’re unsure of how to do this, seek professional advice.
Step 9: Turn your heating back on
When the pressure in your heating system is normal, turn your heating back on and check your radiators for cold spots. If any cold spots remain, or if they come back quickly, you may have underlying problems in your heating system. This may indicate a small air leak or sludge in the system. Seek professional advice to investigate any issues further.

